Monday, November 22, 2010

Modern Floral Chair

First of all, I fell in love with this fabric! I love the turquoise,mustard and gray together. Since there was no cushion on the seat I had to do tuck in around the seat. I also ended up using velcro on the bottom edges of the slipcover to hold it down and keep the concave curve on the front of the chair. If that makes sense.

Sorry these pics are in my garage and not in my clients beautiful home, but my fabulous husband is dropping this off for me. So if I wanted a pic I had to do it before he left. I can't expect him to do my drop off and take pictures for me too.


Chair before


Chair after


Photobucket

Join  us Saturdays at tatertotsandjello.com for the weekend     wrap    up           party!

Friday, November 19, 2010

Chocolate brown Wingback chair

My client has had this chair forever and it has been reupholstered quite a few times. This time she decided to have it slipcovered in a chocolate brown cotton fabric. We did a box pleat skirt all the way around the bottom and let the legs show. She said she'll probably paint the legs cream to create more of a contrast with the brown fabric. I loved the idea, I am sure it'll look great.


Chair Before


Chair After
Close up
another closeup of the skirt.

Photobucket

Friday, November 12, 2010

Mitered Ottoman

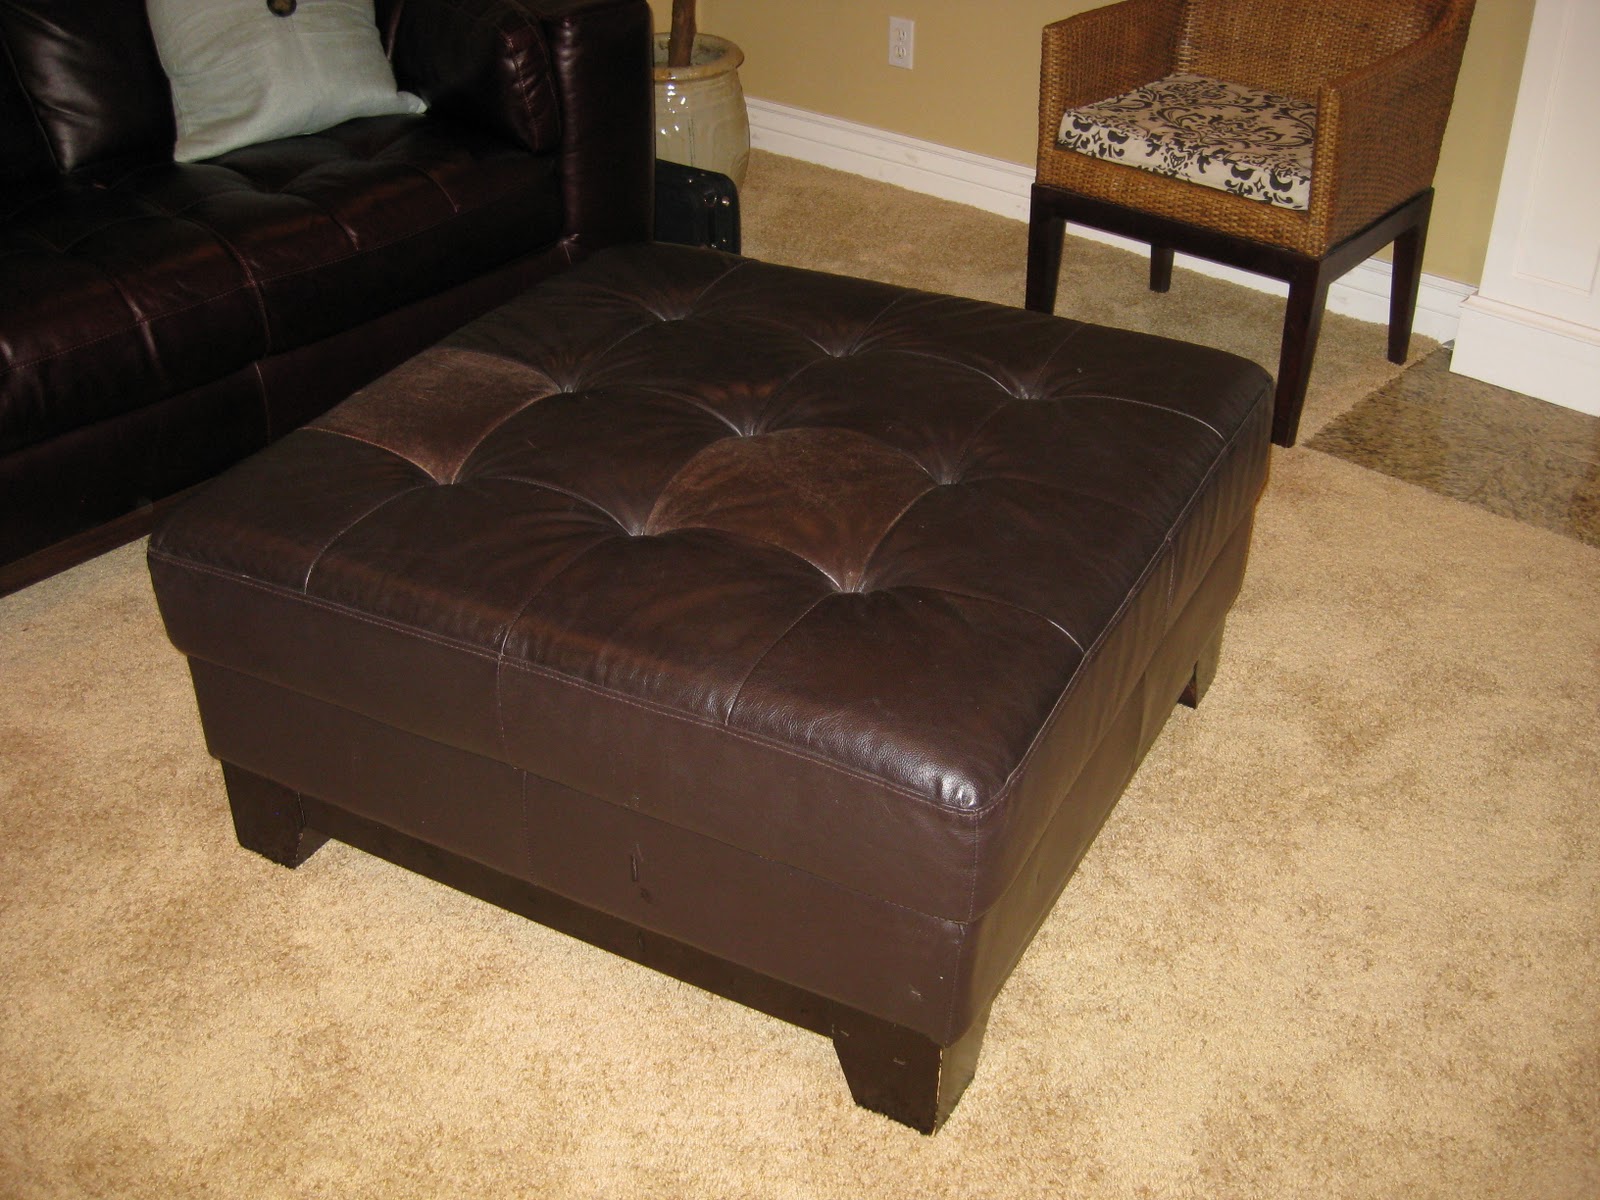
My client was debating on choosing a different fabric for this ottoman, because she wasn't sure about the stripes. So I held off on starting it for a few days, to see what she decided. As I was working one day, it dawned on me that we could do 4 triangles and sew and X seam and make the stripes match up to look like a square. I loved the idea and was excited to share it with my client....she said she trusted me and to go for it.

We used the dark brown stripe in the fabric for the piping, and decided to make the very center part of the dark stripe rather than the light section. The ottoman was perfectly square, so our plan worked and I love the way it turned out....stripes with out being stripes.


Ottoman before. Leather, but she wanted to bring in some more color since the sectional was also leather.

After

Close up of after showing the X seam from corner to corner

Showing the whole room with other pillows on the couch that we did.

Photobucket

Join  us Saturdays at tatertotsandjello.com for the weekend     wrap    up           party!


<br /> <center><a href="http://alliemakes.blogspot.com/search/label/Making%20It%20With%20Allie" target="_blank"><img src="http://i835.photobucket.com/albums/zz279/alliemakes/Photo-Frame.png" border="0" alt="Party Button" /></a></center><br />

Friday, November 5, 2010

Insulation project at the cabin

A couple weeks ago, we decided to take on reinsulating underneath the cabin. We wanted to get this done before winter to help with the cold. We brought up our boys and three of their friends, so 6 boys in all were brought on this journey (age 10 and under).


Heber was nice enough to do the demo on his own. He tore down the old plywood, took out all the old insulation that the mice had gotten to. He knows I don't do mice very well...or actually at all. Once he had it all torn out, he calked in between every single floor plank. Then he put up plastic in between every joist.

Then this is when I stepped into help after running errands to buy more supplies and trying to keep all the boys fed and under control. They spent most of their time building a fort off in the trees.

I cut all the new insulation and helped put it up, then we had to put new plywood up to cover the insulation. Then Heber foamed every crack and joint, so that no little critters could crawl into the new insulation.
Heber working on stapling up the plastic

Close up of all the calking between the floor boards. I think I spent about $80 just on calking, and another $40 on spray foam.

Here's what it looked like with the new insulation before we put up all the plywood.


This is what Heber looked like after working in the dirt for a day....just imagine what the six boys looked like!!!


Here are some of the boys that came. So now that winter is going to be here next week, we are officially done with the outside projects until next year.

Next year we plan to put on a new roof and build stairs into the grade with railroad ties. We will also do the handrail on the deck.

This year our outside projects were
1) deck
2)getting waterline buried
3)grading to make some flat areas
4)seeding and laying hay so we'll have growth next year...instead of dirt
5)reinsulating underneath the cabin


Photobucket


Sunday, October 31, 2010

Vegas Ragnar Relay

So many of you already know I am addicted to running relay races. Here's how it goes...usually about 185-200 miles, 2 vans, 12 people on your team. You each take turns running, so you each run three different times. So your total mileage ranges from 12-20 miles each. So there are spots for beginners as well as veterans. You usually get about 3-4 hours of sleep, and the race takes about 30 hours. It is the most fun thing you will ever do. I promise! check out http://www.ragnarrelay.com/  have races all over the country. Also http://www.redrockrelay.com/  is in the St. George Area. People dress up and decorate their vans, so it's always pretty entertaining.

So last weekend, Heber and I ran in the Vegas Ragnar relay. It started in the Valley of Fire and ended in Vegas. We had some amazing exchanges at Huge Casinos with pools and hot tubs and lounge chairs. We got spoiled, normally exchanges are at churches or schools. You sleep on the grass or the gym floor. Sometimes there are showers, and sometimes not so much. One of our exchanges we slept under some swings on a playground.

I have run 6 relay races in the past 16 months. My legs this time were 8.8 miles/ 3.2 miles/ and 6.1 miles. There are six of us that are usually in the same van, we all know eachother's routines and we have a great time together.
Here is Heber and I at the start line.

Here is our Van of 6 at the start line.. Jared, Camille, Heber, Shelley, April, Brad


Here is Me and Camille at the finish line waiting for van 2 to cross the finish line.


Here is our whole team at the finish line.


Here is me with my girls and all our medals...it's all about the medals. Heber and I have quite the collection going. I keep telling him that when our grandkids go through our stuff, they are going to think we were pretty cool.

So our incentive to make Vegas our 4th relay this year was because of the medals...you got the regular Vegas medal for running...If you ran the Wasatch Back in Utah and Vegas, you got a second medal called "Saints and Sinners". THen if you ran Vegas and any other race besides Wasatch Back this year you got a third medal called, "Deuces Wild". We ran the Los Angeles Ragnar.  So there you have it three medals to run one race, of course I was in.
Heber and I showing off all our medals


Halloween Side Note

SO, I went to help at a 2nd grade party the other day for Halloween, and when I showed up all the other five moms were dressed up in costume, and I wasn't. It didn't even cross my mind to dress up.

So two hours before we were supposed to go to some friends house for a pre trick or treat party, it dawned on me that maybe we were supposed to dress up. So I asked Heber and he laughed and said yes, of course everyone else is dressing up. He took the easy way out and wore his fireman turnouts from work. I put together a cowgirl outfit for myself.

Heber humors me, he knows I am not super into holidays because of the extra effort required on top of everything else (aka sewing). SO he always buys the pumpkins and candy, because he knows it doesn't cross my mind. What a good man I've got for myself.

Photobucket

Tuesday, October 26, 2010

Gloria's Quilted slipcover

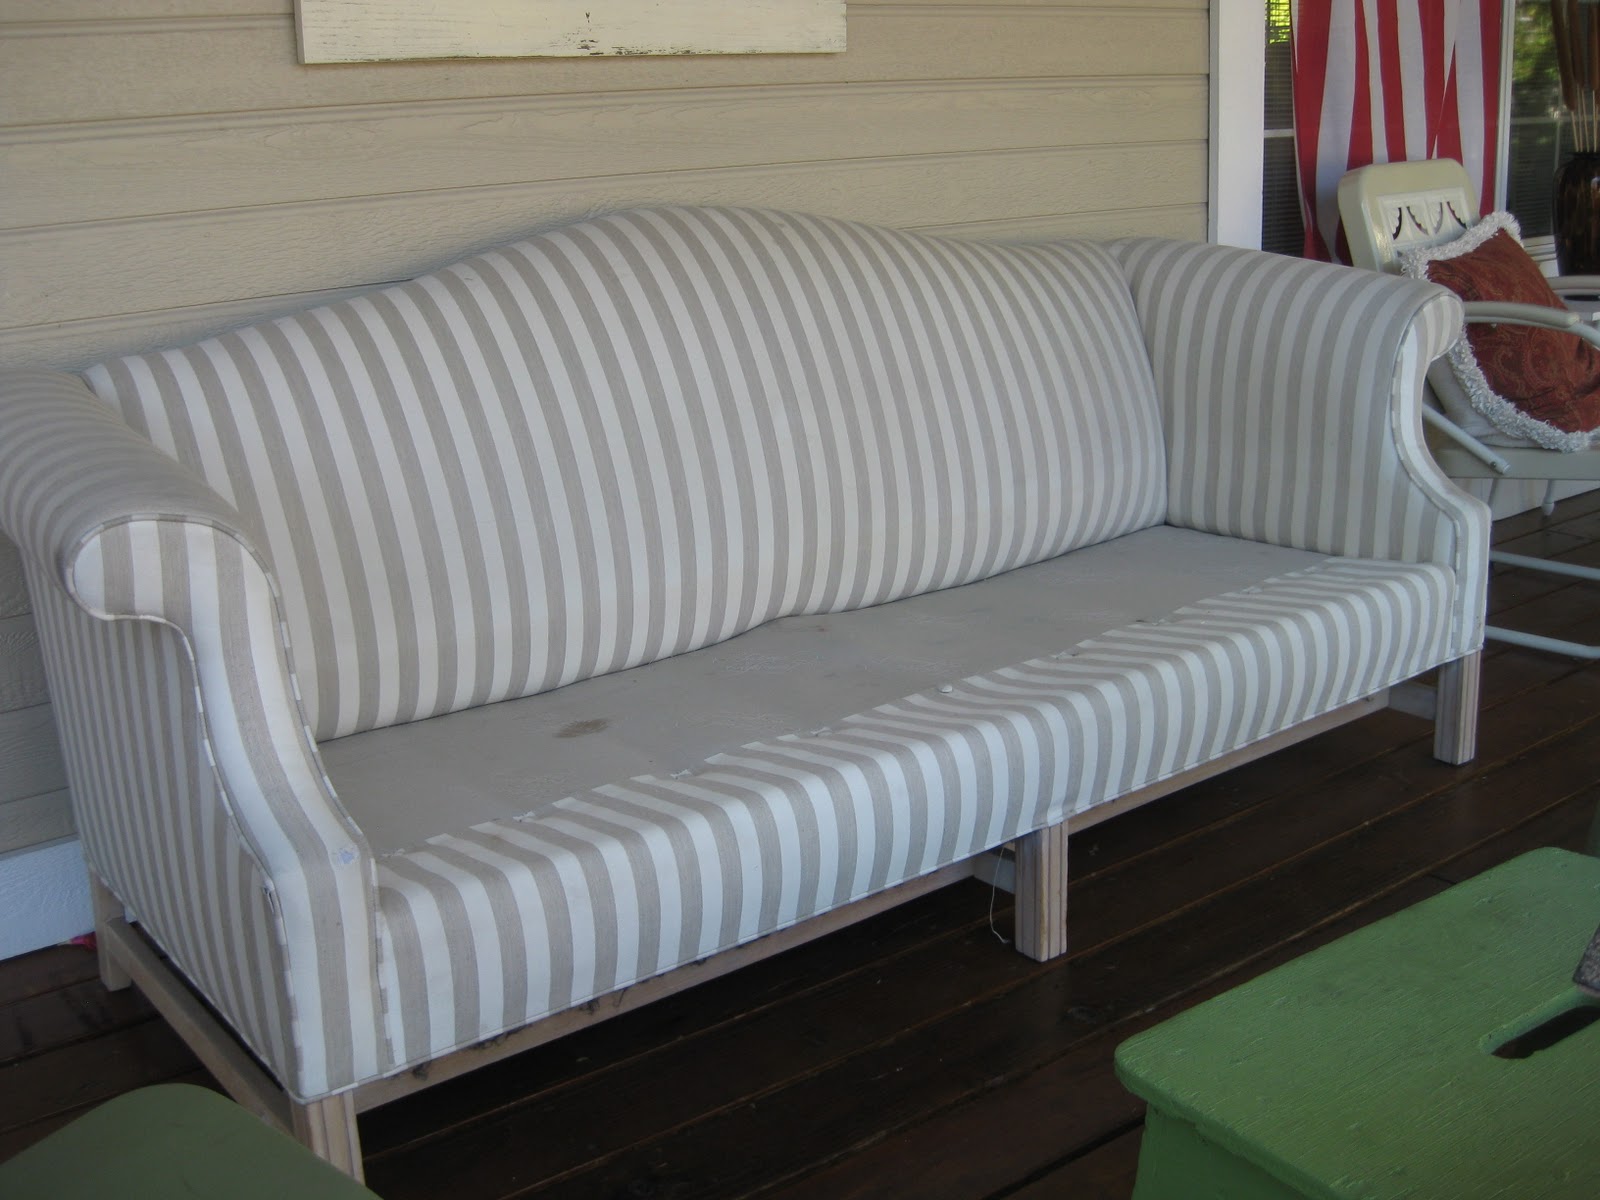
This couch was for my client Gloria...who is one of my favorite clients. The first time I met with her I was 6 months pregnant with my second baby, which was 8 years ago! I think we have slipcovered everything in her house...some of it twice. Couch, loveseat, chairs, parson chairs, ottomans, setee, cushions, and of course tons of pillows.

This couch was the first couch they had bought when they got married 30 years ago, she has it sitting on her wrap around porch. She's had quilts draped on it being held together with safety pins.

Finally she called me and wanted to make it permanent. She only had 2 queen size quilts...so I knew it would be tight. I picked up some cream canvas to use for the piping, decking, and on the bottom of the cushions. I had a 6" strip left and that was it.

I utilized the original quilt binding to be the end of the slipcover on the bottom next to the legs.


Before


After


I love her wrap around porch


Close up of outside arm

Quilt binding on bottom edge

Front of arm
Photobucket

Thursday, October 21, 2010

Debbie's Bedding


Yesterday I took back beddding for Debbie's amazing bed. She had the White Euro pillows in the back. I made 3 standard shams with piping out of the brown toile. The large check bolster, I had to line because the fabric was so thin, which worked out great for the 1.5" ruffle on the ends of it.


She wanted something out of the blue stripe just to tie in the footstool covers that I made for the end of the bed. So I decided to do a boxed round pillow...which felt a little masculine for the bed, so I added about 7 layers of circles of the fabric and tufted it in the middle with a covered button. So it kind of looks like a rosette or flower.


She told me that she had seen these footwarmers everywhere, and wanted one for the end of the bed. This is the first time I'd ever heard of a footwarmer. Basically it's a mini duvet that's only about 48" tall by 98" wide that you drape on the end of the bed. We went with a 3" ruffle on the edges. She bought all her fabrics off http://www.fabric.com/


I ran piping down the seams on the footwarmer to finish it off where it had to be pieced. the back is out of the brown check, so she can always flip it over if she wants a change.

The footstools were from a consignment store,  which had navy blue upholstry on them. I made a little slipcover for both of them and ended the bottom with pipng so the wood legs could show.

Her room turned out amazing!!! We also slipcovered a couch for her bedroom out of the brown toile, which she decided to hold off on moving out of her family room until her new couch arrives in a few weeks. So when I go back I'll take pics of it then.

Photobucket

Thursday, October 7, 2010

Kids playroom loveseat (Ikea fabric)

This loveseat was for my client that was redoing her basement and turning it into a playroom. She got her fabric from Ikea. She said it was such a random crazy pattern, that she didn't think it needed to be matched up....but I couldn't help myself, I pattern matched the seat cushions to the back cushions (mountain continues).

Loveseat before, I think it used to be her mom's


Loveseat After


Close up of the cushion pattern match (seat pattern continues up on to back cushion)


She chose the no skirt option, so we just ended it with piping. I think the kids will love it!


Photobucket


Join  us Saturdays at tatertotsandjello.com for the weekend wrap   up           party!

giveaways