About a week and a half ago, Camille and I came up with the idea of redoing our friends bedroom, who was going through some hard times. Conviently she was going on a cruise with some of her family and was going to be gone for 5 days. For the past few weeks she kept mentioning that she wanted to redo her room in yellow and gray.
Now or never was our thought....so we put a facebook message to some other neighbors and April's family to see if they'd be willing to chip in $10-$20 to our makeover fund. We got a great reponse, so I got online and ordered some fabric. Let's just say I had about 20-25 girls from our neighborhood and April's family that wanted to help or contribute!
Here is her bedroom before.....
Here is her room AFTER...... I made myself jealous! I wanted it to be my new room!
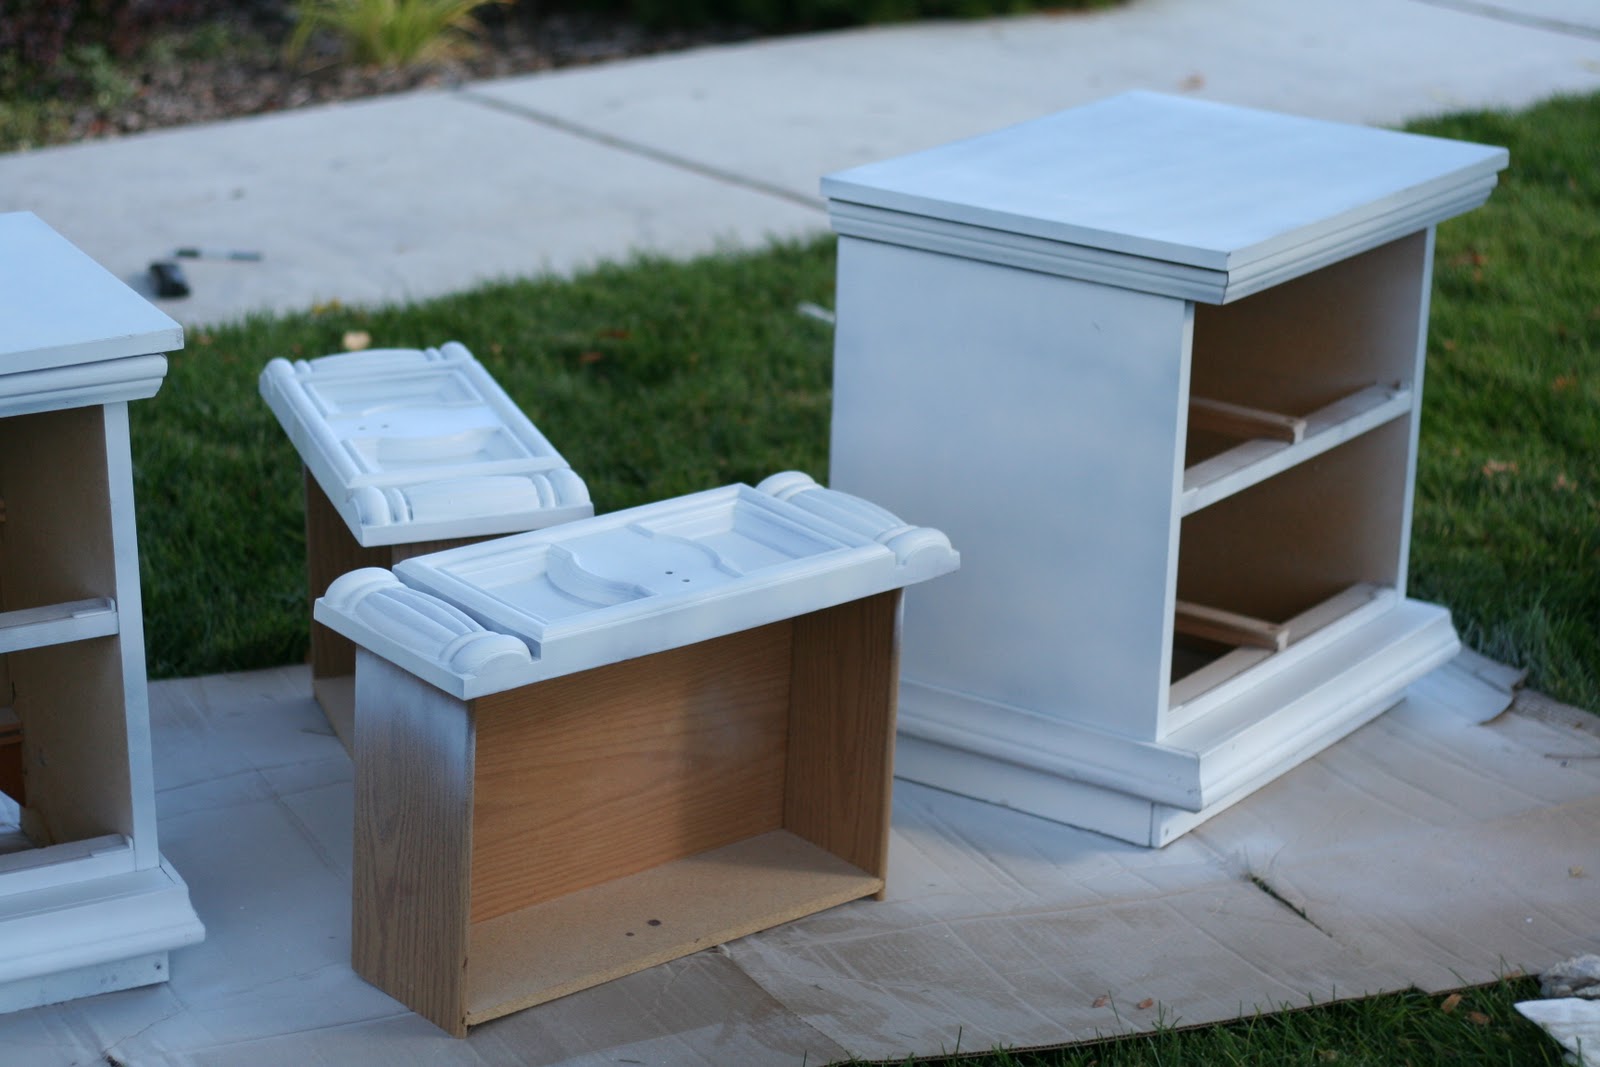
About a week before we decided to do this makeover, Camille and I were running laps around our neighborhood and saw these two beaten up end tables on the curb. We talked...oh those could be cute, but we don't need them.
A week later.....now we need end tables for April's room! In my mind I was thinking they would be the perfect scale for her bed, which sits pretty low. So I called my other running partner that lives on the north end of the neighborhood to see if by chance they were still sitting out on the curb. She ran out to check...they are still there, but someone put them in the trash can.
I swung by and picked up Camille and we rescued the ugly end tables from the trash.
Some of the girls came to help sand, primer and paint the end tables yellow.
They have spray can primer! It worked out great!
Then we painted them a mustard yellow color.
Of course we needed some "Man work" done, so I recruited Heber (my husband) and Camille's husband. They were awesome...they hung our old door that we were going to use as a headboard, reinstalled the curtain rod, which was pulling out of the wall, and hung the old window above the headboard. I know they hate doing this type of stuff...but they didn't complain at all.
The curtain rod needed to be fixed...I had them extend the right bracket further outside the window, so the curtains hang more on the side of the window and make the window look bigger.
After we got everything installed and the bed made...we had lots of neighbors that came to help clean, to make it look nice for when April got home from her cruise.
Lots of cars out front!
Cariann even showed up with a carpet cleaner!
As a finishing touch, we needed something to hang over the dresser. I had an old frame that was pulling apart on the bottom corner because the boys knocked it off my wall a few years ago.
Andrea from
poppies at play blog lives in our neighborhood and is awesome with wood, so she came and grabbed the frame and fixed it for us. A bunch of the girls cut out magazine words that described April and we made a collage for the frame.
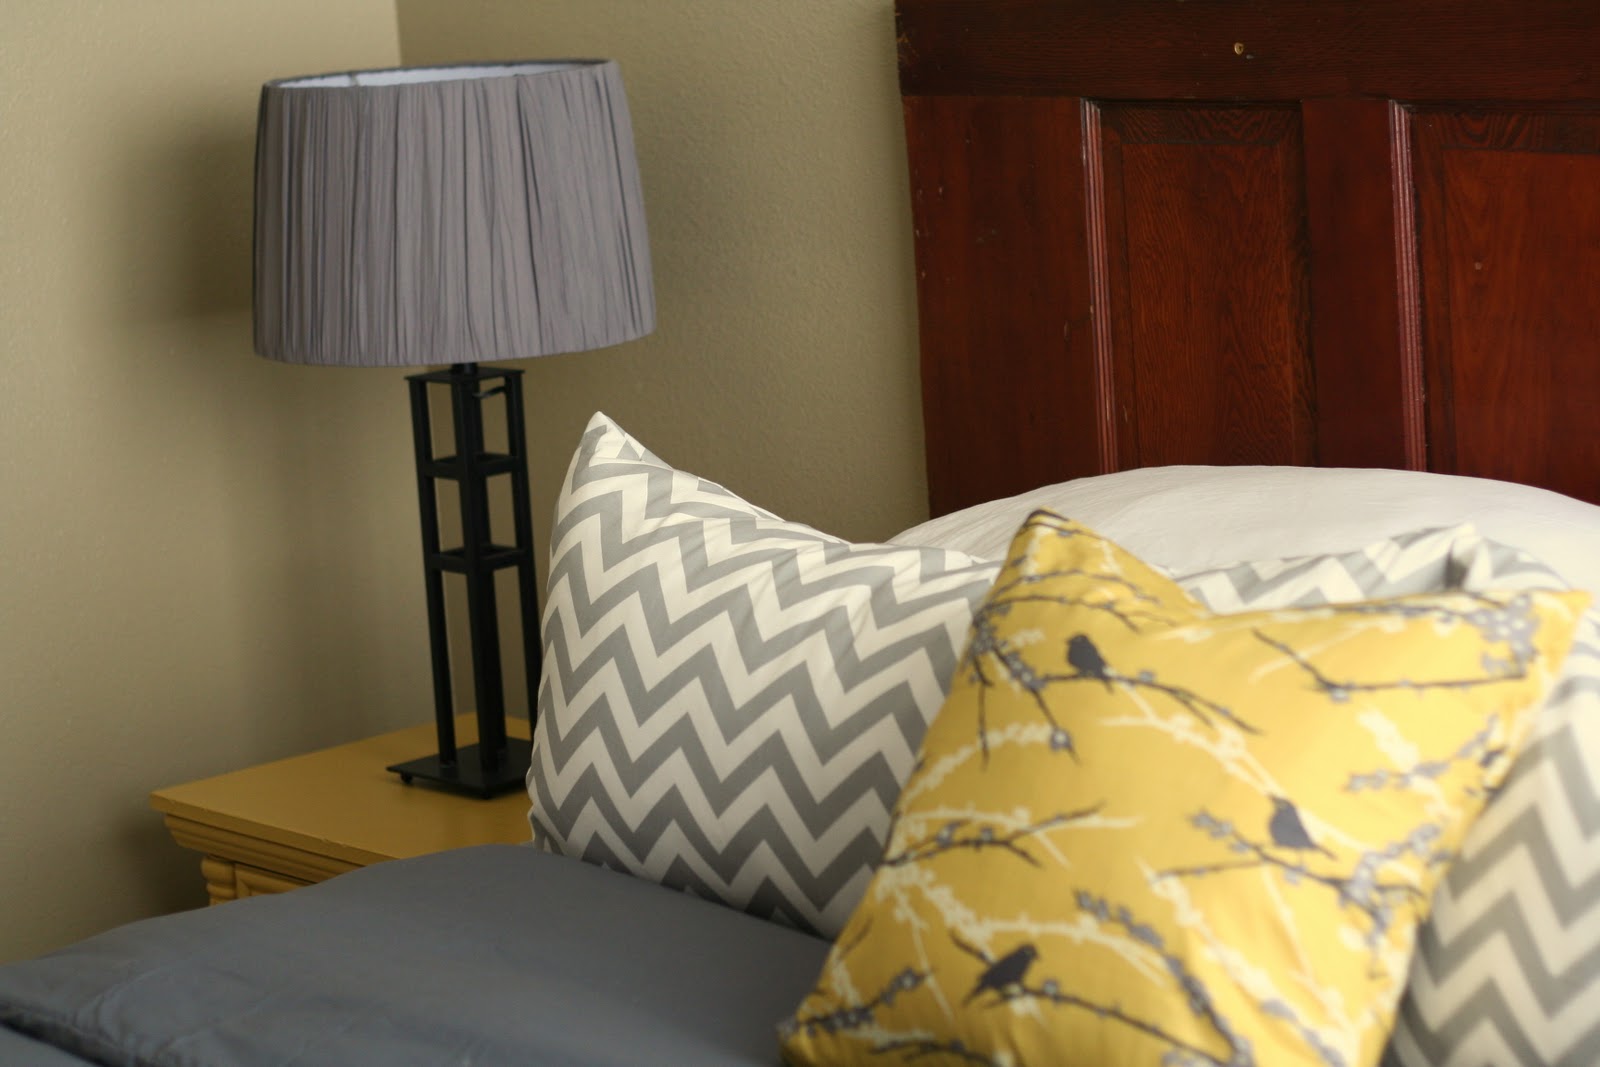
Here is another shot of the bed. I ordered the gray zigzag (chevron fabric) from
http://www.fabricguru.com/ for $8/yd and made it into king size pillow shams. I decided no piping to make them feel more modern.
I made the gray duvet from two flat sheets from Walmart ($17 each). The bird fabric and all the footwarmer fabrics were generously donated by one of my clients...she had already made what she needed to and gave me all her scraps and extras.
My neighbor Becky donated the lamp bases (she didn't need them anymore) and I found the BEAUTIFUL lamp shades at Target ($25 each)...dark gray rouched fabric.
I left the original hardware on the endtables.
I found the door on
KSL.com for $40. I loved the hardware on the door and decided to show it off. The window was hanging in her daughters room, we decided we needed it more than she did.
Andrea from
poppies at play also does vinyl... she surprised us when she showed up to help clean and gave us this gray sign that she made! We set it on the end table ("Be still and know that I am God")
Close up of end table... We were thinking of rubbing some stain on it, or antiquing it...but after we painted it and saw how beautiful it was we change our minds and left it alone.
Loving all the fabrics together!
Pillows
For the end of the bed, I wanted a bench of some sort. I scoured
http://www.ksl.com/ classifieds and found these two identical matching ottomans for $20 each. I slipcovered them in some gray chenille fabric, and left the legs alone. I liked the wood color on the legs to tie in the headboard, window, and dresser.
Footwarmer....my son Carter helped me lay out all the fabric squares and made the pattern random. He even helped me sew the squares together.
Another after
Here is the collage we put together.
This picture was taken with my phone right after we set up... not the best quality but you can see everything. My camera lens is a really tight lens and I couldn't get far enough away to show everything in the same pic. We were still trying to locate another lightbulb for the second lamp.
We pulled this together in 6 days! Camille, Teresa and I had to leave early Friday morning and drive to Vegas to run in the
Ragnar Relay and April wasn't getting home till late Friday night. We were going to miss the big surprise reveal.
A few of the other girls showed up and hid behind the bed and in the closet, waiting for April's arrival. They even video taped her reaction for us, since we couldn't be there.
While we were on the race chilling in the van waiting for our turn to run our night leg, they texted us this picture of April on her new bed! Love this girl and all the girls that chipped in and helped! Eagle Mountain, UT is an awesome place to live!