Saturday, September 3, 2011

Stripe bedroom chair

This was for a client in Park City...she had a pair of these chairs that she was using in separate bedrooms. She decided to make 3 covers total, so she could switch them out. She did a white one and a red pinstripe one that I'll show off later. The third one she did was this red/blue/white/ tan stripe.


Before....old chairs from her mother in law, but the perfect shape and size. Small and petite and can snuggle into any corner.


After....Love the way it turned out, please don't mind the wrinkles.... I have to fold them up and put them in bags while transporting, so the wrinkles will fall out over the next day or two.


Front view.


I did piping on the inside arm seam just to make it look more finished....and then I did a kiss pleat on the top corner of the chair. I do this when the corner is more rounded than square.


Side of chair


Side Note ---- I ran the Grand Teton Relay a few weekends ago...the whole family came and we stayed at my running partner's in-laws cabin in Island Park. Her whole family came too. We got there a day early and floated the river on a raft. 3-4 hours is a long time to be in a confined space with 5 kids who got bored after the first 45 minutes. Luckily we found a rope swing a few hours into it and the kids played on it for awhile.


Here's my family out in front of the raft rental place.


The next day was "race" day. The husbands and kids came to cheer for us along the course...pom poms and all. I even taught them how to yell, "GO RUNNNNNNER!" a few nights before. Luke had it down. Now when we are driving around town, they roll down their windows and cheer for random runners on the road.


The kids came to get a snuggle after my first leg was over. It was 7.4 miles and the last 2.5-3 miles were a serious uphill. I still managed to average 9:30 per mile. Logan (my oldest) even got out and ran with me for a little while....until he tripped on some gravel and skinned his knee.


Here is Camille, me, and April...my race buddies. I think we've done about 8 races together. We are at the Grand Targhee Ski resort and it's about 7 am and we are getting ready to run our third leg. We had already been on the course almost 24 hours at this point, we slept in the van, because it was too cold to get out.
Here we are...April is getting ready to run her last leg. My last leg was 3.2 miles and I managed to average 8:25 min. per mile and I passed a guy! My only roadkill for the whole race. There were only 46 teams total, because it was the first year. So we didn't see many people out on the course during our runs. Oh yes and we were 3rd to last place! Although to make ourselves feel better...some volunteers did tell us that some teams skipped some of their night runs because they were too scared to run through trees on trails.


Photobucket

Wednesday, August 31, 2011

Chenille bedspread chair slipcover

This chair was for my client named Holly. It was for her daughter's room. I had done a small loveseat (all white) about 3-4 years ago for her out of this same fabric, she thought we could repurpose the slipcover and take it apart and salvage the fabric to make a new slipcover for this chair....All the pieces were going to work except the loveseat arms were more shallow than the chair. She went to get more white denim and the store was all out, but she fell in love with this mint green color.

I told her we could use if for the arms and then make the piping out of it as well, to make it all make sense. Good thing for me, that way I could cut most of the slipcover apart instead of unpicking all the seams to salvage the piping.

Here's the chair before.


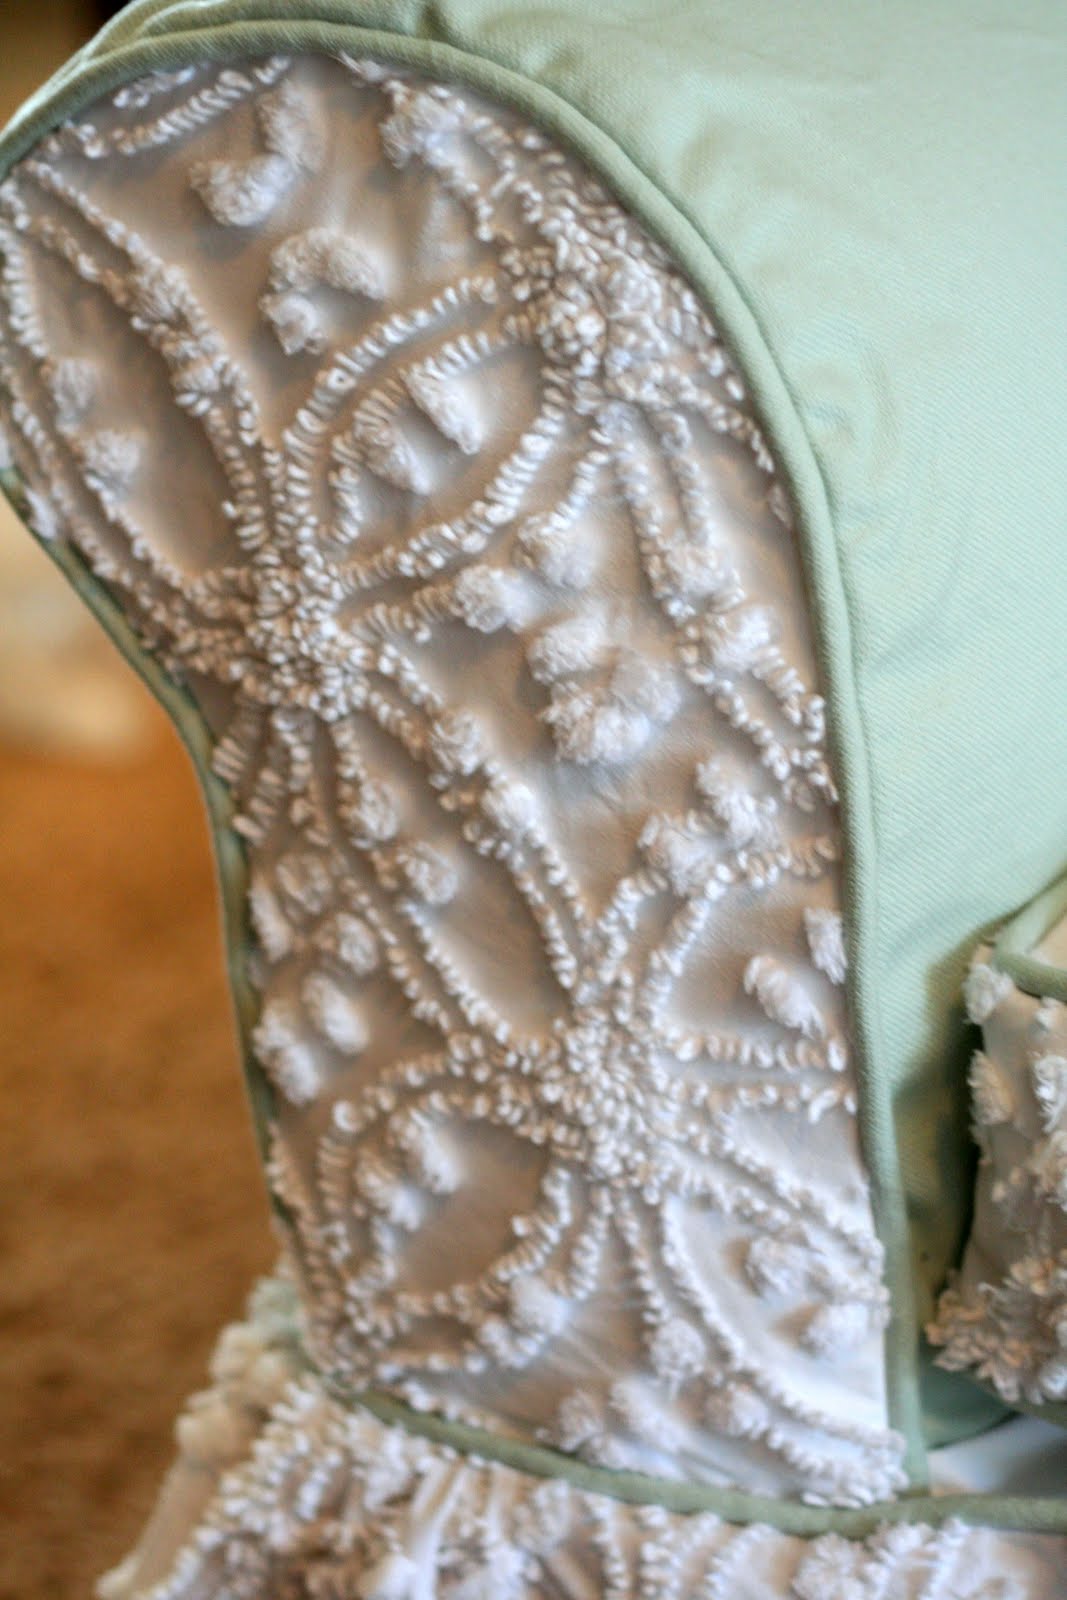
Here it is after...we used white denim on the seat cushion, outside back, inside back, decking, and back cushion band. The wedding ring chenille is from a vintage bedspread. I utilized the fringe around the outside of the bedspread for the hem of the skirt.


The front of the arms were the EXACT same size as the loveseat....so I had to unpick very carefully, I needed every 1/8" possible for seam allowances. I lined the chenille to give it more strenth, it was feeling pretty thin and not very sturdy.


Side of chair.

I lined the chenille band on the seat cushion as well as the chenille on the back cushion.
I also gathered the skirt around the front corners of the chair, to give it a little fullness.


I loved the green mixed in with the white... it made it look fresh, new, and exciting again.


Wedding ring chenille pattern is my favorite.


Side Note #1-- Here are pics from our hot air balloon ride. We went for our 14th year anniversary earlier this month.


We are in the balloon at this point, waiting for it to take off.
Here's the balloon below us...he had just gotten off the ground. We launched from the Canyons Ski Resort in Park City, UT, and we landed next to a freeway on ramp in the weeds next to the Home Depot in Park City.

I guess they land wherever they can in random fields and what not. We floated over the freeway really low and all the cars and buses were waving and honking. The vans followed us around and picked us up where we landed. We were in the air for a little more than an hour.


Here they are inflating the balloons on the ground. Heber got to help hold it open while the fan and the fire blew into it. It was pretty cool and lots of fun.

Join  us Saturdays at tatertotsandjello.com for the weekend wrap 
 up           party!

Pin It
Photobucket

Tuesday, August 16, 2011

My Bedroom Bedding

About 5 or 6 months ago, I made a footwarmer for my bed out of fabric samples that I bought at the Orem Restore Habitat for Humanity Store. They were 10/$1. I bought a ton...made the footwarmer and then didn't feel like it looked like "me" so I flipped it over and used the solid side instead. I think it was mostly because I couldn't figure out the pillows to go with the patchwork side.

Well I was playing around with some of my old pillows from the front room, and figured it out!


Here it is...I did the brown menswear houndstooth pillow in front of the green stripe pillows and it worked for me. I then used a pea green throw blanket on the bench at the end of the bed.


Close up of the pillows....You can see what I had before here....which I still like, I just really wanted to use the footwarmer with the pieced side up. Plus it's a bonus that it's a little more masculine for Heber.


You can see the footwarmer close up here....my favorite fabric was the gray raised chenille squares (middle right in the pic)


I have a coffee table at the end of the bed with a cushion on it...to act as a bench, or actually a  place to drape all my clothes when I am too lazy to put them away.


All the pillows together. 3 Euros (26"x26"), 2 standard sham (20"x26"), and a kidney (14"x20")pillow. I have a California King bed. Usually you can squeeze 3 Euros on a queen as well....or you can go with 2 if you prefer.


Foot warmer. My white chenille duvet, I made out of a bedspread that I bought at Ross for $20. I just sewed a flat sheet to the back and added a zipper for the opening. It's the wedding ring chenille pattern. I've had it for about 5 years now, and I still love it.
I think I like it and I feel like it's "me"....I love the texture and interest that the footwarmer brings to the room.


Side note #1-- Heading out of town tomorrow. We are going to Yellowstone, and I am going to run the Grand Teton Relay on Friday! Heber and the kids are going to come and cheer us on along on the course.
Side note #2-- Kids start school next week and my youngest starts 1st grade! I am going to have to work just about every day next week while the kids are at school to make up for all these work days I am missing while I am out of town...yet again.


Photobucket

Sunday, August 14, 2011

Cabin reroofing project

Last weekend we headed up to our cabin in Midway, UT to reroof it. We bought the cabin 1 1/2  yrs ago and have slowly worked on projects to "fix" it up. We got it for a screaming deal of $65,000. So we were ok with all the work it was going to need.

We put the roof off last year because it wasn't leaking yet. Well this spring it started to leak in a few spots with the melting snow. So it became a priority for this year. A few months ago, I started looking for shingles on KSL.com (local online classifieds). We needed about 750 square ft of shingles....retail for this amount of shingles was about $800. I got what I needed for $400 off KSL.com. I had to match two different shingles to get enough, but you have to look really hard to tell. When it was all said and done, we had half a bundle of shingles left!

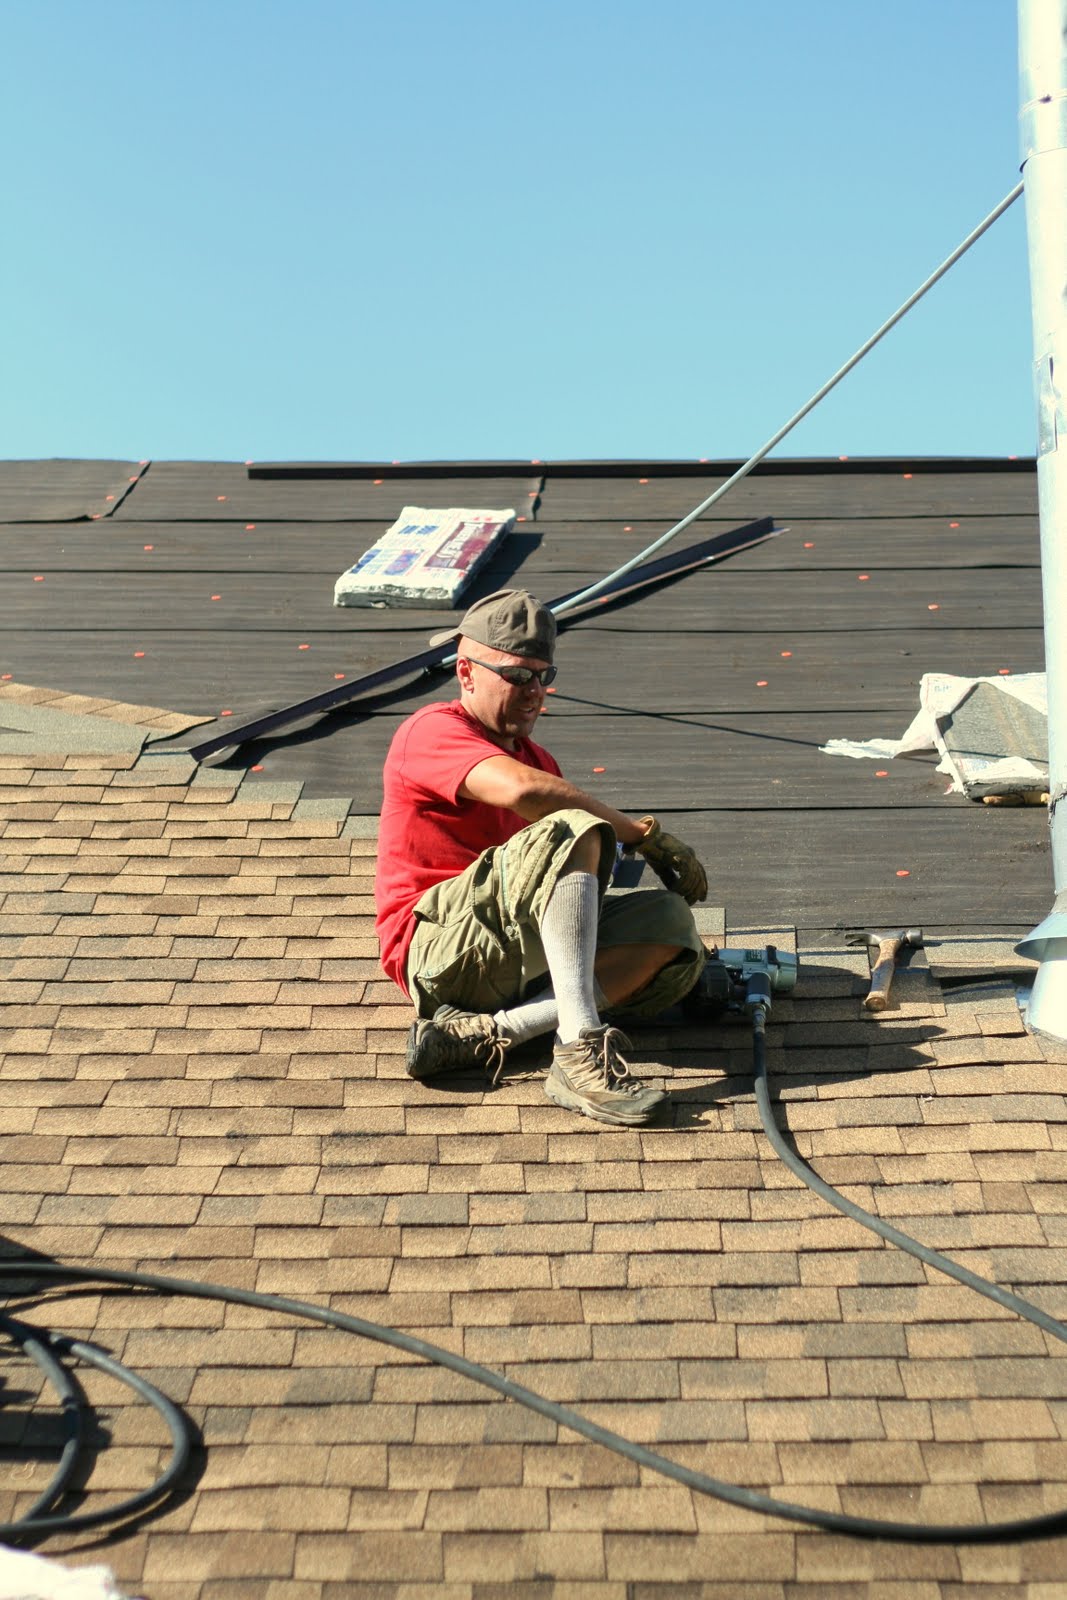
We got up there about noon on Friday and Heber and I started stripping the original roof that was 30 plus years old (built in 1978). There was only one layer of shingles so they came up pretty easy.


See how old those shingles were???


We pushed all the shingles off the egde for the boys to pick up and load in the sled. Once they loaded the sled they hauled it down to the trailer and dumped it. You can see the black sled in the foreground of the picture.


The boys got $.50 cents each per sled full. They made 20 trips total and earned $10 each for their hard work. The boys brought their friend Spencer up to help too. I was so proud of how hard they worked. They really contributed and made a difference.


Once the shingles were stripped, Heber made a run to Home Depot to buy plywood, nails, tar paper, flashing, etc. While he did this I stripped all the tar paper and pulled all the nails from the whole roof. Let's just say I was really ready for bed that night.


We had to replace 5 sheets of plywood...their was some water damage and dry rot to some of the pieces. Here's Logan sitting on the top of the ladder. I told them no kids were allowed on the roof. They got as close as they could.


Our friend Jared came up to help us out.


Here are the kids checking out the progress on the burm behind the cabin.


Heber's brother John came up to help as well.  Yeah for extra help! The second day when they laid the roof...I spent the day cooking and cleaning and driving to the store for more water. We went through 4 cases of water in two days. It was warm up there on the roof.


Here's Carter checking out the progress from the ladder too.


Heber and the boys had to haul the 75 lb. bundles up on to the roof.


Half way done. While they were laying the roof, I had the opporturnity to drive the trailer full of old shingles to the dump with the boys. I was a little nervous about how it was going to all work out. I got it all backed in ok and then the guy tells me no one under the age of 12 is allowed on the deck....uhhh all my helpers were 11 and under. There was no way I could shovel out the whole trailer by myself. Once he saw what was in my trailer, he said they could help...but they had to stay away from the edge.

It took us about 30 minutes in a hot dirty enclosed trailer to get all the shingles out. I could feel sweat dripping everywhere. I was pretty proud of myself. I was a little intimidated, but I did it.


Here is Jared and Heber putting on the flashing right before dark on the second day. They finished right at dark, and we cleaned up in the dark. It was a long day for those boys.


Here's the new roof in the light the next day. Total we spent about $750 to reroof the cabin....not too bad.
Our "fixer upper" cabin....the stairs are still on our to do list.


Here are the boys with Uncle John the next morning. They talked him into taking them for a four wheeler ride before we headed home.

Photobucket